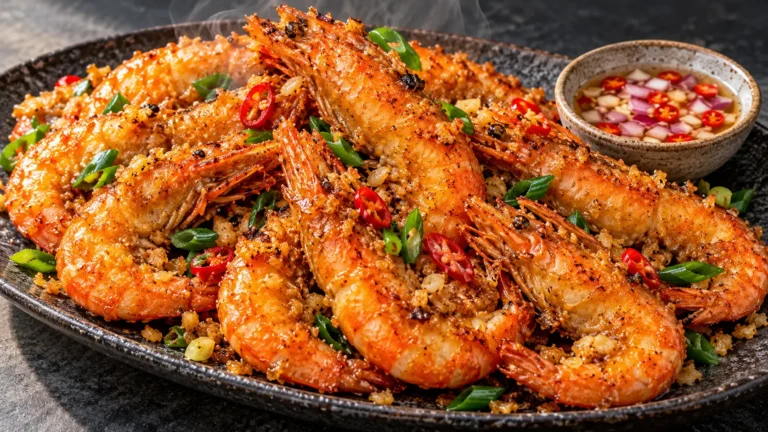
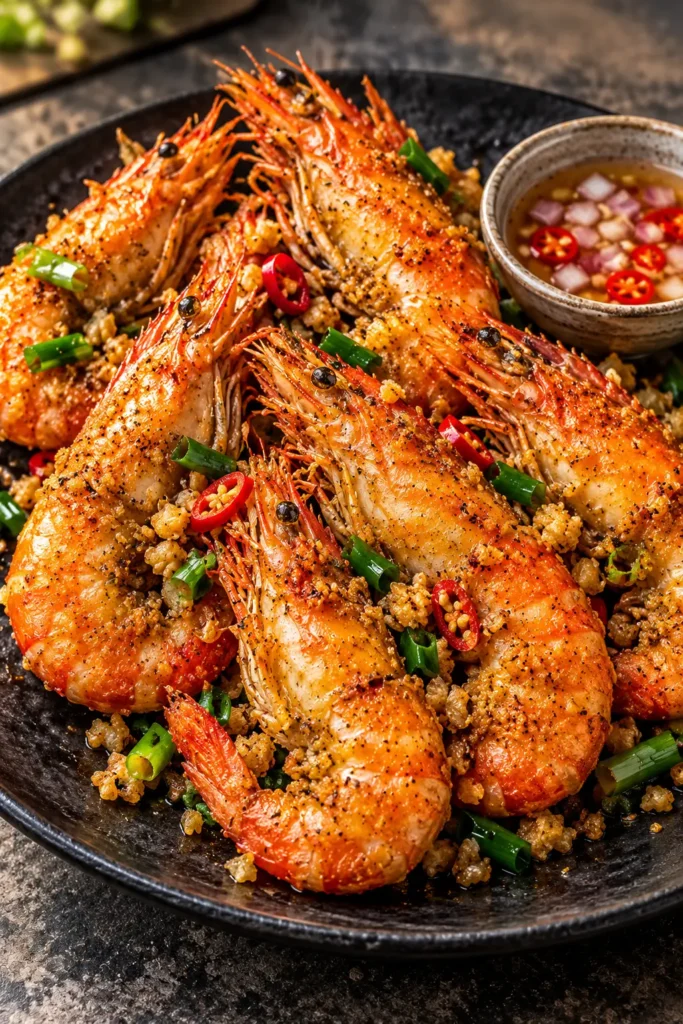
Crispy Garlic Fried Shrimp combines golden, crunchy shell-on shrimp with fragrant toasted garlic, melted butter, and a savory-sweet glaze. Every bite delivers a satisfying crunch followed by juicy seafood flavor, while a tangy Filipino-style suka dip balances the richness. Ready in just 35 minutes, this bold seafood dish makes a delicious family dinner or shareable appetizer.
Quick Overview
- Flavor/Texture: Crispy, garlicky, buttery, savory, slightly sweet, and lightly spicy, with juicy shrimp inside crunchy shells.
- Difficulty: Easy to moderate; beginner-friendly with careful frying.
- Best For: Weeknight seafood dinners, family gatherings, party appetizers, and special occasions.
- Cooking Method: Lightly coat shell-on shrimp in cornstarch, pan-fry until crispy, then toss in garlic butter seasoning.
- Prep Time: 15 minutes
- Cook Time: 20 minutes
- Total Time: 35 minutes
- Servings: 4
- Nutrition: Approximately 360 calories and 33g protein per serving, based on the supplied estimate.
What This Is and Why You’ll Love It
Crispy Garlic Fried Shrimp is a flavorful seafood dish featuring whole shrimp fried with their shells intact and finished in a glossy garlic butter sauce.
The crispy shells create a delicate crunch, while the shrimp remain tender and juicy inside.
Inspired by Filipino-style garlic fried seafood, this recipe pairs rich, savory shrimp with suka, a sharp vinegar-based dipping sauce commonly served alongside fried dishes.
Here’s why this recipe deserves a place on your dinner menu:
- Irresistibly crispy texture: A thin layer of cornstarch helps the shrimp develop a light, golden crust without heavy breading.
- Bold garlic flavor: Ten cloves of minced garlic create a wonderfully aromatic coating that complements the sweetness of the shrimp.
- Rich, glossy garlic butter: Butter, soy sauce, and brown sugar form a savory-sweet finish that clings to the crispy shells.
- A refreshing vinegar dip: Cane vinegar, red onion, garlic, and chili create a tangy contrast to the fried seafood.
- Ready in 35 minutes: The short cooking process makes this a practical option for busy evenings.
- Perfect for seafood lovers: If you enjoy buttery shrimp dinners, you’ll also love this easy Garlic Butter Shrimp recipe.
The combination of crispy seafood, toasted garlic, and vibrant dipping sauce makes this dish especially satisfying when served straight from the pan.
Ingredients
For the Shrimp:
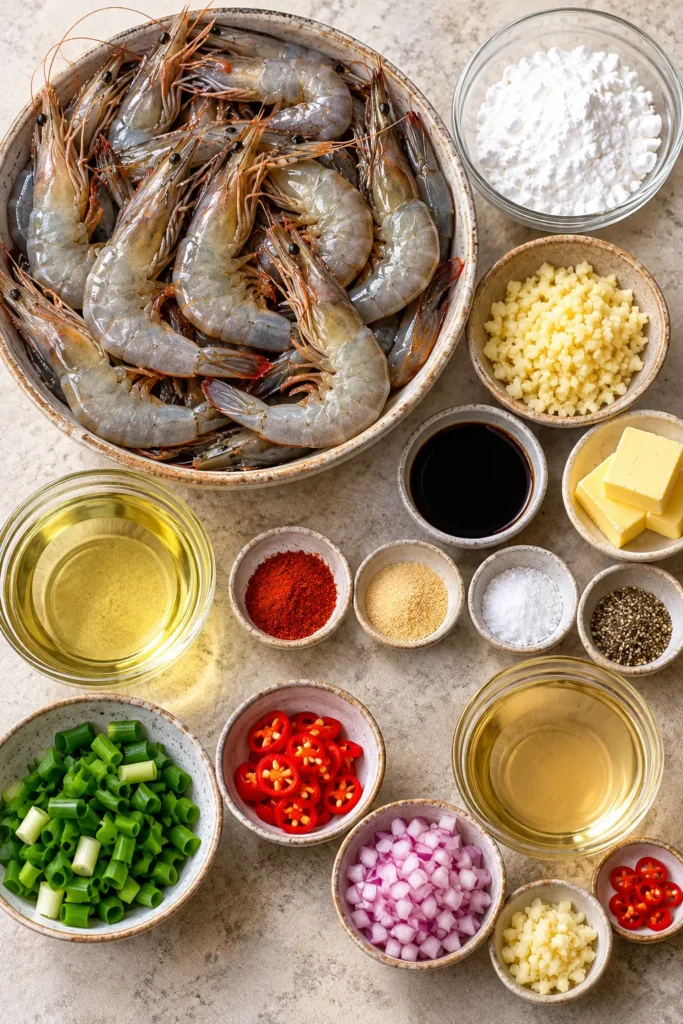
- 2 lb large shell-on shrimp, preferably with heads on
- 1 tsp salt
- 1/2 tsp ground black pepper
- 1 tsp garlic powder
- 1/2 tsp paprika
- 1/3 cup cornstarch
- 1/2 cup neutral cooking oil, plus more as needed
- 10 garlic cloves, finely minced
- 2 tbsp unsalted butter
- 1 tbsp soy sauce
- 1 tsp brown sugar
- 2 green onions, cut into 1-inch pieces
- 1 small red chili, sliced, optional
For the Suka Dip:
- 1/2 cup cane vinegar or white vinegar
- 2 tbsp finely diced red onion
- 1 garlic clove, minced
- 1 small chili, sliced
- 1/4 tsp ground black pepper
- Pinch of salt
- 1/2 tsp sugar, optional
Key ingredients
Large shell-on shrimp
Shell-on shrimp are the centerpiece of this recipe. Their shells help protect the delicate meat during frying while creating the signature crunchy exterior.
Large shrimp are ideal because they retain a juicy center while the outside becomes crisp.
Keeping the heads on adds another layer of seafood flavor, although headless shell-on shrimp also work.
Cornstarch
Cornstarch creates a light coating that helps the shrimp develop a crisp exterior.
Unlike thick flour-based breading, it allows the natural shape and flavor of the shrimp to remain prominent.
A light, even coating produces the best results.
Fresh garlic
With 10 cloves in the garlic toss, fresh garlic provides the dish’s most recognizable aroma.
Cooking it gently in butter and a little reserved frying oil helps bring out its savory sweetness.
The goal is lightly golden garlic, not dark brown garlic.
Unsalted butter
Butter adds richness and helps distribute the minced garlic and seasonings evenly.
Combined with soy sauce and brown sugar, it forms a glossy coating over the crispy shrimp.
Soy sauce and brown sugar
Soy sauce contributes saltiness and umami, while brown sugar softens the sharp edges of the seasoning.
Together, they create a balanced sweet-savory finish without overpowering the shrimp.
Cane vinegar
Cane vinegar gives the suka dip its distinctive bright acidity.
The diced red onion, garlic, chili, and black pepper add freshness and a little heat.
Substitutions
The original ingredient list above remains unchanged. These optional alternatives are useful when shopping or adjusting the recipe to personal preferences.
- Shrimp: Use 2 lb large headless shell-on shrimp if whole head-on shrimp are unavailable.
- Vinegar: White vinegar can replace cane vinegar using the same 1/2 cup measurement already listed.
- Neutral cooking oil: Vegetable, canola, or another neutral high-heat cooking oil works well.
- Paprika: Smoked paprika can replace regular paprika in the same amount for a deeper smoky flavor.
- Soy sauce: Use 1 tbsp gluten-free tamari if avoiding wheat-based soy sauce.
- Chili: Leave out the optional red chili in the shrimp toss for a milder finish.
How to Make It
Follow these five steps for crispy garlic fried shrimp with golden shells, fragrant garlic, and a flavorful vinegar dipping sauce.
1. Prepare the Shrimp
Rinse the shrimp and pat them completely dry with paper towels.
Trim the sharp antennae and pointed tips while leaving the shells and heads intact.
Season the shrimp with salt, black pepper, garlic powder, and paprika. Toss gently to distribute the seasonings.
Doneness/preparation cue: The shrimp should be thoroughly dry before coating. Excess moisture can cause splattering and prevent the shells from crisping properly.
2. Coat Lightly
Place the cornstarch in a shallow bowl.
Add the seasoned shrimp and toss until each piece has a thin, even coating.
Shake off any excess cornstarch before frying.
Texture cue: The shrimp should look lightly dusted rather than covered in a thick white layer.
A thin coating creates the crisp texture without producing a heavy crust.
3. Fry Until Crisp
Heat the neutral cooking oil in a large skillet or wok over medium-high heat.
Carefully arrange the shrimp in a single layer.
Fry in batches for approximately 2 minutes per side, until the shells become crisp and the shrimp are cooked through.
Transfer the fried shrimp to a paper towel-lined plate.
Doneness cues:
- The shells should appear golden-orange and lightly crisp.
- The shrimp meat should be firm, pearly, and opaque rather than translucent.
- The shrimp should curl into a gentle C-shape.
- For a precise temperature check, the thickest part should reach 145°F.
Avoid overcrowding the skillet, which lowers the oil temperature and encourages steaming instead of frying.
4. Make the Garlic Toss
Carefully pour off most of the frying oil, leaving about 1 tbsp in the pan.
Reduce the heat.
Add the unsalted butter and finely minced garlic.
Cook gently until the garlic becomes fragrant and lightly golden.
Stir in the soy sauce, brown sugar, green onions, and optional sliced red chili.
Mix until the seasonings combine into a glossy garlic butter coating.
Flavor cue: The garlic should smell nutty and aromatic with a pale golden color.
Avoid cooking it until dark brown, as burnt garlic can make the sauce bitter.
5. Toss and Serve
Return the crispy fried shrimp to the skillet.
Toss gently for 1 to 2 minutes, just long enough to coat the shrimp with the garlic butter mixture.
Avoid prolonged cooking because the shrimp are already fully cooked.
In a small bowl, combine the vinegar, diced red onion, minced garlic, sliced chili, black pepper, salt, and optional sugar.
Mix well.
Transfer the hot shrimp to a serving platter and serve immediately with the prepared suka dipping sauce.
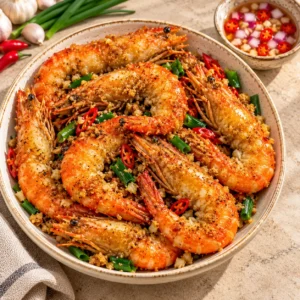
Final texture cue: The shrimp should have crisp shells with a light, glossy garlic coating and juicy meat inside.
Serve while hot for the best crunch.
Pro Tips
A few small techniques can make a noticeable difference when preparing crispy shell-on shrimp.
- Dry the shrimp thoroughly. Moisture is one of the biggest obstacles to crisp frying. Pat the shells dry before adding the seasonings and cornstarch.
- Choose similarly sized shrimp. Large shrimp of uniform size cook more evenly and are easier to fry in batches.
- Keep the cornstarch coating thin. Excess coating can become powdery or form uneven clumps during frying.
- Heat the oil before adding shrimp. Properly heated oil encourages crisping rather than allowing the shrimp to absorb too much oil.
- Fry in small batches. Leave enough space around each shrimp so the oil temperature can recover quickly.
- Protect the garlic from burning. Reduce the heat before adding butter and minced garlic. Garlic can turn bitter within seconds if the skillet is too hot.
- Avoid excessive tossing. Once the shrimp are fried, coat them gently in the garlic butter sauce to preserve their crispy coating.
- Keep the vinegar dip separate. Pouring it directly over the shrimp will soften the shells. Serve it in a small bowl for dipping.
- Serve immediately. Crispy fried shrimp taste best shortly after cooking, while the shells are crunchy and the garlic butter is still warm.
Variations
The original recipe offers plenty of flavor, but a few optional adjustments can change the experience without complicating the process.
1. Spicy Garlic Fried Shrimp
Include the optional sliced red chili in the garlic butter toss.
This creates a slightly hotter finish that complements the savory soy sauce and sweet brown sugar.
Keep the chili in the suka dip for an extra spicy contrast.
2. Smoky Garlic Shrimp
Replace the regular paprika with the same amount of smoked paprika.
The smoky notes work particularly well with fried shrimp and toasted garlic.
This is a simple way to create a different flavor profile while keeping the cooking method the same.
3. Mild Garlic Butter Shrimp
Leave out the optional red chili from the garlic toss.
The shrimp will still have plenty of flavor from garlic, paprika, butter, and soy sauce.
Serve the vinegar dip separately so guests can control how much chili they enjoy.
4. Extra-Tangy Suka Version
Choose white vinegar instead of cane vinegar, using the same amount.
Leave out the optional sugar in the dip for a sharper, more acidic finish.
This version is especially refreshing alongside rich fried seafood.
5. Headless Shell-On Shrimp
Use large shrimp with the shells intact but the heads removed.
The shrimp will still develop a crispy exterior while being slightly easier to handle at the table.
For another crispy seafood appetizer that doesn’t require peeling shells, try these Shrimp Cakes with Lemon Aioli.
What to Serve With It
Crispy Garlic Fried Shrimp has a rich, savory flavor, so the best side dishes either absorb the garlic butter or provide a light, refreshing contrast.
Here are eight delicious serving ideas:
- Steamed jasmine rice: Soft, fluffy rice is a classic pairing for savory garlic shrimp and its buttery coating.
- Garlic fried rice: A flavorful rice dish complements the toasted garlic and soy sauce. For a substantial seafood feast, pair it with this Shrimp Fried Rice Recipe.
- Cucumber and tomato salad: Cool, crisp vegetables balance the richness of the fried shrimp.
- Stir-fried bok choy: Tender greens with lightly crisp stems provide freshness and a pleasant contrast.
- Steamed broccoli: Mild broccoli pairs well with the stronger flavors of garlic butter and vinegar.
- Garlic noodles: Buttery noodles create a satisfying seafood dinner when you want something more filling.
- Pickled vegetables: Their bright acidity echoes the flavor of the suka dipping sauce.
- Fresh green salad: A simple salad with a light citrus dressing helps balance the fried seafood.
Best pairing: Steamed jasmine rice with cucumber salad and the tangy suka dip creates a satisfying meal without competing with the shrimp’s bold flavor.
Storage
Crispy garlic fried shrimp are best enjoyed immediately after frying.
The shells gradually soften as they absorb moisture from the garlic butter coating, so fresh preparation gives the best texture.
Refrigeration
Allow the shrimp to cool briefly, then transfer them to an airtight container.
Refrigerate within two hours of cooking and enjoy within 2 days for the best quality.
Store the vinegar dipping sauce separately in a covered container in the refrigerator.
The dip is best enjoyed within approximately 2 to 3 days.
Reheating
For the best texture, reheat the shrimp in an oven or air fryer.
Arrange them in a single layer and warm at approximately 350°F until heated throughout.
For food safety, previously cooked leftovers should reach 165°F when reheated.
Avoid reheating for longer than necessary, since the shrimp can become tough.
The microwave is convenient but tends to soften the crispy shells.
Freezing
Freezing the finished garlic butter shrimp is not recommended.
After thawing, the shell coating may become soft and the shrimp meat can lose its tender texture.
For the best result, prepare and serve this dish fresh.
Make-Ahead Preparation
You can prepare several components in advance:
- Trim and clean the shrimp, then keep them refrigerated.
- Measure and combine the dry seasonings.
- Mince the garlic and slice the green onions.
- Prepare the vinegar dipping sauce and refrigerate it separately.
Coat the shrimp with cornstarch shortly before frying so the exterior stays dry.
Troubleshooting
1. The shrimp aren’t crispy.
Possible cause: The shrimp were too wet, the oil wasn’t hot enough, or the skillet was overcrowded.
Solution: Pat the shrimp completely dry, preheat the oil, and fry in smaller batches.
2. The garlic tastes bitter.
Possible cause: The garlic cooked over excessive heat or became too dark.
Solution: Reduce the heat before adding the minced garlic and cook only until lightly golden.
3. The shrimp are rubbery.
Possible cause: The shrimp cooked too long during frying or the final garlic butter toss.
Solution: Remove the shrimp from the oil once the meat is opaque and fully cooked. Keep the final toss brief.
4. The coating falls off during frying.
Possible cause: The cornstarch was applied too heavily or the shrimp were not dry enough.
Solution: Use a thin, even coating and shake off excess cornstarch before frying.
5. The finished dish feels greasy.
Possible cause: The frying oil was too cool, the shrimp absorbed excess oil, or too much frying oil remained in the pan.
Solution: Maintain steady frying heat, drain the shrimp after frying, and leave only about 1 tbsp oil for the garlic butter toss.
6. The sauce makes the shrimp soggy.
Possible cause: The shrimp spent too long in the garlic butter sauce.
Solution: Toss gently for only 1 to 2 minutes and serve immediately with the vinegar dip on the side.
FAQs
1. Can you eat the shells on crispy garlic fried shrimp?
Yes, properly fried shrimp shells can become thin and crunchy enough to eat, depending on the shrimp’s size and shell thickness.
However, eating the shells is optional.
Some diners prefer peeling the shrimp before eating. Remove any sharp pieces and use caution around the head and tail.
2. Can I make crispy garlic fried shrimp without the heads?
Absolutely.
Headless shell-on shrimp work well and still develop a crisp exterior during frying.
Keeping the shells intact is more important to this recipe’s texture than keeping the heads attached.
3. Why is cornstarch used instead of flour?
Cornstarch creates a lighter, more delicate crisp coating.
It also helps absorb surface moisture, encouraging the shrimp shells to become crunchy during frying.
Unlike a thick flour batter, cornstarch allows the shrimp’s natural shape and flavor to remain prominent.
4. How do I know when fried shrimp are fully cooked?
Look for opaque, pearly flesh and a gently curved shape.
The shells will usually turn pink-orange as they cook.
For an accurate food-safety check, shrimp should reach an internal temperature of 145°F.
Cooking times vary depending on shrimp size and skillet temperature, so use these cues rather than relying on time alone.
5. What is suka dipping sauce?
Suka is the Filipino word for vinegar.
A typical suka dipping sauce combines vinegar with ingredients such as garlic, onion, chili, and seasonings.
Its acidity provides a refreshing contrast to rich fried foods, especially seafood.
6. Can I use frozen shrimp?
Yes, frozen raw shrimp can work well.
Thaw them completely in the refrigerator before cooking.
Drain away excess moisture and pat the shrimp thoroughly dry.
Avoid frying shrimp directly from frozen because the added moisture can cause splattering and interfere with crisping.
7. Can I prepare the vinegar dip ahead of time?
Yes.
The suka dip can be mixed in advance and stored in a covered container in the refrigerator.
Preparing it ahead allows the onion, garlic, and chili flavors to mingle with the vinegar.
Stir before serving.
8. Can I make this recipe less spicy?
Yes.
Leave out the optional red chili from the garlic butter toss.
You can also adjust the amount of chili used when serving the vinegar dip.
The shrimp will still have a strong garlic butter flavor from the remaining seasonings.
Conclusion
Crispy Garlic Fried Shrimp delivers everything seafood lovers enjoy: crunchy golden shells, juicy shrimp, fragrant toasted garlic, and a rich, savory butter coating.
The tangy suka dipping sauce adds a refreshing contrast, while the simple skillet method keeps the entire meal manageable in just 35 minutes.
Serve this crispy garlic fried shrimp hot with rice, vegetables, or your favorite side dish, and save the recipe for your next seafood dinner.
Try it, share it with your family, and tell us how your crispy garlic shrimp turned out!
Follow Us
Love easy seafood recipes, creamy dinners, and quick weeknight meals?
👉 Follow us on Facebook for daily viral recipes and cooking inspiration
👉 Save your favorite recipes on Pinterest for easy meal planning and seafood ideas
Crispy Garlic Fried Shrimp
Equipment
- large skillet or wok For frying the shrimp in batches and preparing the garlic butter coating.
- shallow bowl For lightly coating the seasoned shrimp with cornstarch.
- paper towels For drying the raw shrimp thoroughly and draining excess oil after frying.
- small mixing bowl For combining the vinegar, onion, garlic, chili, and seasonings for the suka dipping sauce.
- serving platter For serving the crispy garlic fried shrimp immediately with the dipping sauce.
Ingredients
- 2 lb large shell-on shrimp, preferably with heads on
- 1 tsp salt
- 1/2 tsp ground black pepper
- 1 tsp garlic powder
- 1/2 tsp paprika
- 1/3 cup cornstarch
- 1/2 cup neutral cooking oil, plus more as needed
- 10 garlic cloves, finely minced
- 2 tbsp unsalted butter
- 1 tbsp soy sauce
- 1 tsp brown sugar
- 2 green onions, cut into 1-inch pieces
- 1 small red chili, sliced, optional
- 1/2 cup cane vinegar or white vinegar
- 2 tbsp finely diced red onion
- 1 garlic clove, minced
- 1 small chili, sliced
- 1/4 tsp ground black pepper
- pinch salt
- 1/2 tsp sugar, optional
Instructions
- Rinse the shrimp and pat them completely dry with paper towels. Trim the sharp antennae and pointed tips while leaving the shells and heads intact. Season the shrimp with salt, black pepper, garlic powder, and paprika. Toss gently to distribute the seasonings evenly.Preparation cue: The shrimp should be thoroughly dry before coating. Excess moisture can cause splattering and prevent the shells from becoming crispy during frying.
- Place the cornstarch in a shallow bowl. Add the seasoned shrimp and toss until each piece has a thin, even coating. Shake off any excess cornstarch before frying.Texture cue: The shrimp should look lightly dusted rather than covered in a thick white layer. A thin coating creates a delicate, crispy exterior without producing a heavy crust.
- Heat the neutral cooking oil in a large skillet or wok over medium-high heat. Carefully arrange the shrimp in a single layer. Fry in batches for approximately 2 minutes per side, until the shells become golden-orange and crispy and the shrimp are cooked through. Transfer the fried shrimp to a paper towel-lined plate.Doneness cues: The shells should appear golden-orange and lightly crisp. The shrimp meat should be firm, pearly, and opaque rather than translucent. The shrimp should curl into a gentle C-shape. For a precise temperature check, the thickest part should reach 145°F.Avoid overcrowding the skillet, which lowers the oil temperature and encourages steaming instead of frying.
- Carefully pour off most of the frying oil, leaving about 1 tablespoon in the pan. Reduce the heat. Add the unsalted butter and finely minced garlic. Cook gently until the garlic becomes fragrant and lightly golden.Stir in the soy sauce, brown sugar, green onions, and optional sliced red chili. Mix until the seasonings combine into a glossy garlic butter coating.Flavor cue: The garlic should smell nutty and aromatic with a pale golden color. Avoid cooking it until dark brown, as burnt garlic can make the sauce bitter.
- Return the crispy fried shrimp to the skillet. Toss gently for 1 to 2 minutes, just long enough to coat the shrimp with the garlic butter mixture. Avoid prolonged cooking because the shrimp are already fully cooked.In a small bowl, combine the vinegar, diced red onion, minced garlic, sliced chili, black pepper, salt, and optional sugar. Mix well to prepare the suka dipping sauce.Transfer the hot shrimp to a serving platter and serve immediately with the prepared suka dipping sauce.Final texture cue: The shrimp should have crisp shells with a light, glossy garlic coating and juicy meat inside. Serve while hot for the best crunch.
Notes
Nutrition
All nutritional information is based on third party calculations and is only an estimate. Each recipe’s nutritional value will vary depending on the ingredients used, measuring methods, and portion sizes.